How to age a guitar: Surf Green + Golden Age
In this article you will learn about the aging process of the guitar. Step by step, in a professional and simple way.
We will start the process from an already painted guitar, which will be varnished and we will obtain this characteristic vintage touch, which most of our customers like so much.
If you want to learn the step by step that must be followed before reaching this stage, I suggest you read our complete guide on how to paint a guitar.

1 Phase: Preliminary steps
Once you are here, your guitar can be at 2 different points:
- It is a bare wood body, which you will need to anchor and apply colour to, before you start to age it.
- Another option is if your guitar is already painted and varnished and you simply want to give it an aged look.
Whether it is the first or second option, you can start to age your guitar with the layers of varnish that will follow the colour, which is what we will detail in this article.
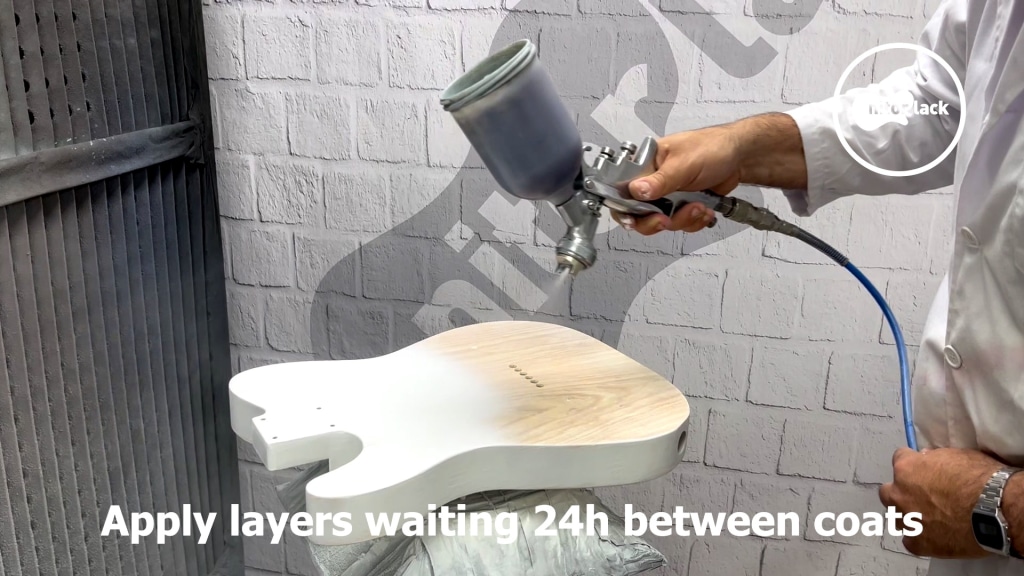
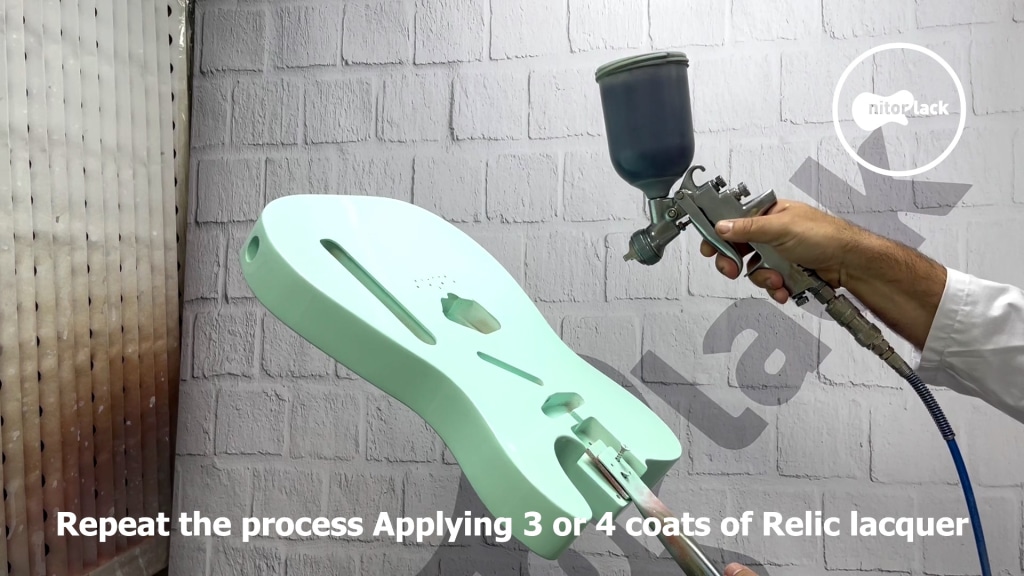
- You will need to use either Golden Age lacquer or Lacquer Relic, depending on the effect you want to achieve.
- Any of these lacquers should be applied in at least 3 thin coats, allowing at least 12-24 hours between coats to dry.
- Sand between coats smoothly, using 800 and 1200 grit sandpaper.
- Let dry for 15 days, so that the nitrocellulose evaporates all its solvents.
2 Phase: We polish the surface:
The polishing step will be very important in any painting process. In this process all the imperfections will be eliminated and the guitar’s shine will be highlighted, which even trying to simulate an aged look will look much better if it has been polished.
- Before starting this polishing process it will be very important to have respected the drying time of at least 15 days.
- We do a complete sanding process with 1000, 1500, 2000 and 3000 grit sandpaper.
- For this process we will use the polishes in 10 grit along with the accessories that are necessary for each client.


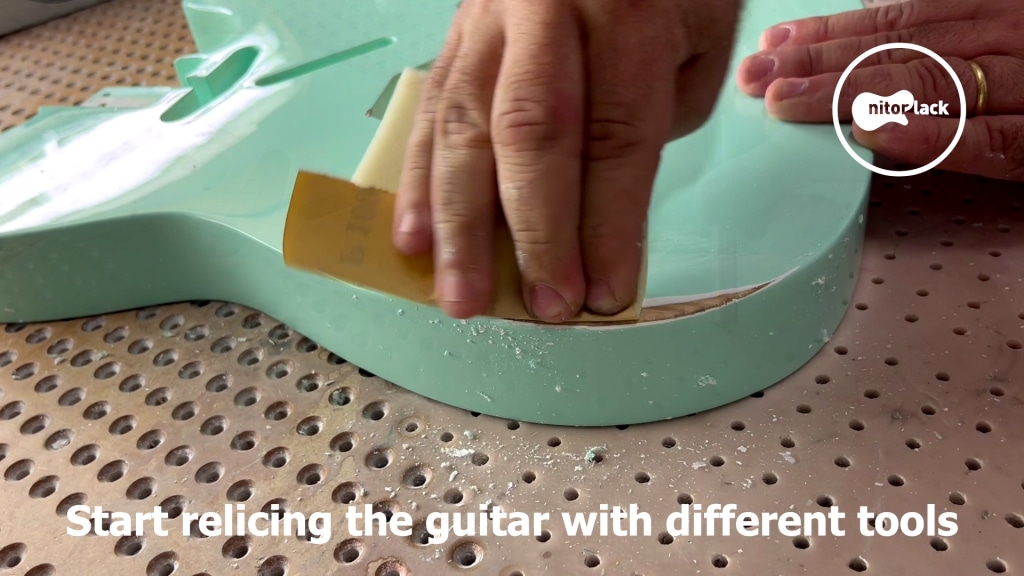
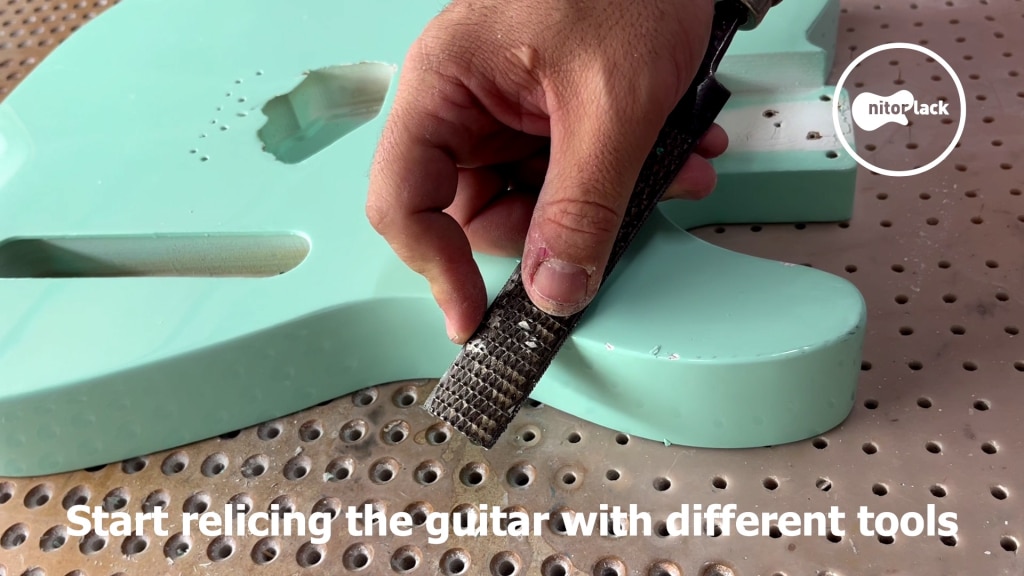
3 Phase: Guitar aging
- With a razor blade we mark the areas where we want to simulate the most pronounced wear. With this we will achieve a more “natural” look in that area and therefore have the vintage look we are looking for.
- We can sand or damage as many areas as we want, although we do not recommend marking this type of damage too much initially.
- We hit the surface with a piece of metal weighing at least 100 grams. With this we get small breaks in the varnish that will be the ones that the lines will tend towards once we produce the cracking of the varnish.
- Another tool to use will be a file, with which we will easily “damage” the varnish on the sides.
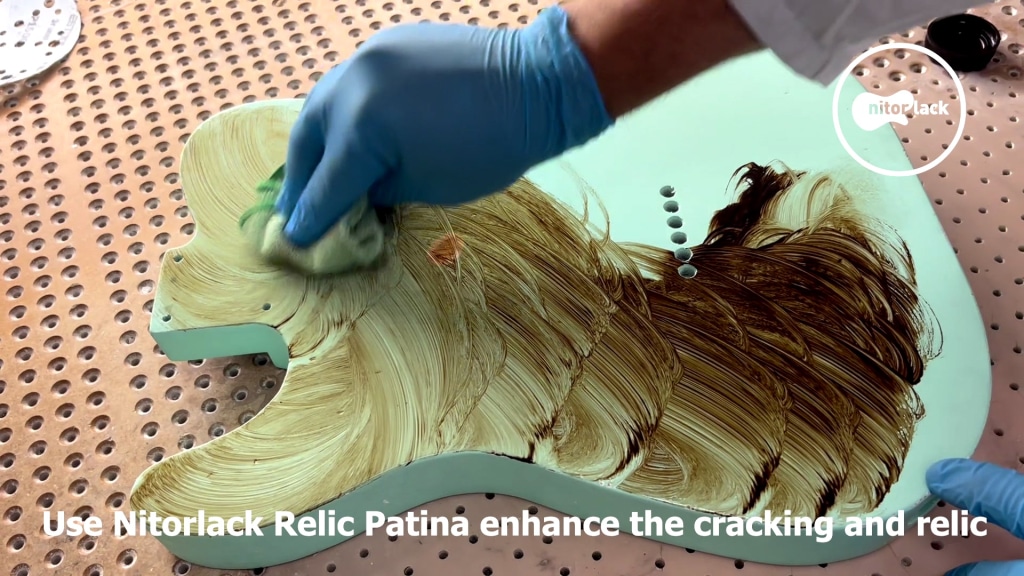
- The next step will be to subject the guitar to a cold process. In order to produce the breaks, we will have to put the guitar in the freezer for at least 8 hours, and leave it at room temperature for another 6 hours. Once the guitar comes out of the freezer, the first cracks should have appeared.
- The next step is to use the product RELIC PATINA. Just when the guitar comes out of the freezer we will have to apply this product with a cloth, on the whole guitar. Let it dry for 2 to 4 minutes and remove it with a clean cloth.
- It is important to respect the recommended time before removing it. If you remove it before it has started to dry, it will not fill in the lines, and if you let it dry too long, it will be more expensive to remove it from the surface.
- Repeat the process of FREEZER+ RELIC PATINA, for at least 3 times, until you get the desired highlighting of the lines.