How to disassemble a guitar
The process of disassembling a guitar can be somewhat complex for those who have never done it before. This process is a previous and fundamental step that precedes the painting or varnishing work. Therefore, with this tutorial we want to make sure that once you decide to make a colour change, you can be sure that you are doing it correctly.
You will see that in this guide, how to disassemble your guitar is explained in a simple way. The preparation work for repainting is also detailed at the end.
In this case we are going to use a Stratocaster guitar, although there are many other guitar models and there may be slight variations, this manual will serve as a reference, due to their similarity.

What tools will you need?
- Phillips screwdriver or electric screwdriver with Phillips tip.
- Allen keys
- Cutting pliers
- Guitar tuning crank (optional)
Step-by-step disassembly guide:
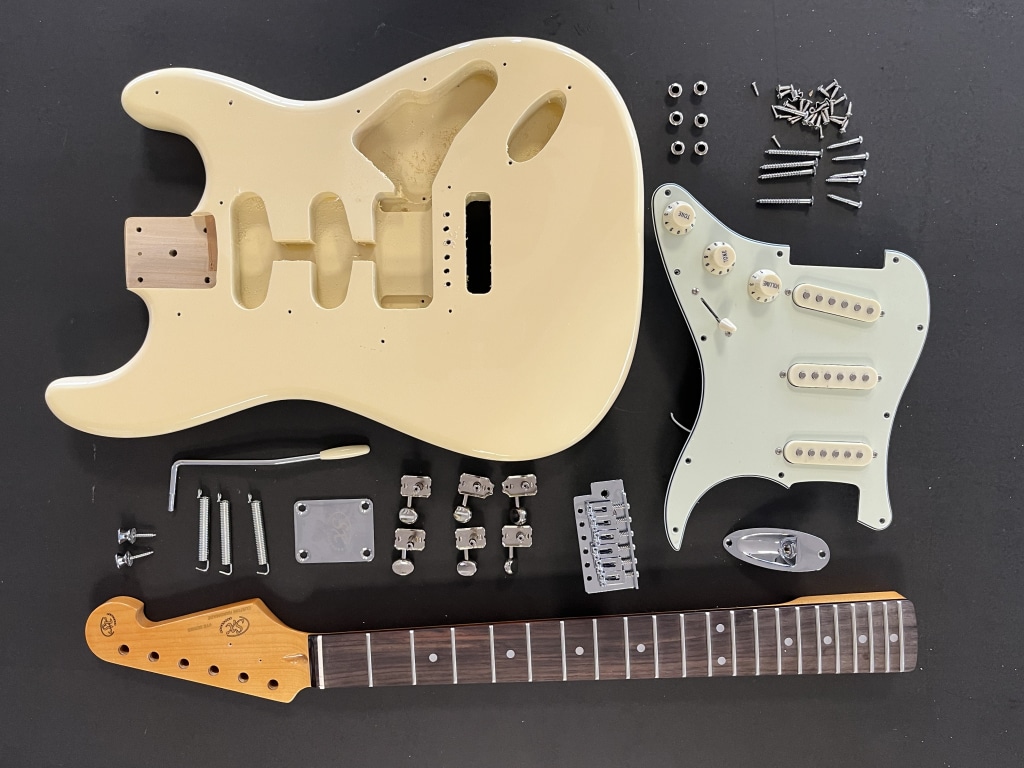
1º – The first thing we must have is a clean, tidy surface with good lighting. Remove tension from the strings, at this point we can remove them if we want to reuse them or cut them to take advantage of a change of strings. We will disassemble the back cover and remove them.
2º – The next step is to disassemble the bridge, to do this remove the rear springs and the 6 anchor screws at the front. With this we will be able to remove the bridge from our guitar.
3º – Now it’s time for the electronics. Cut the bridge ground cable at the back of the guitar and remove all the screws that hold the pickguard. Remove the jack plate and cut the wires. With this done we can now remove the pickguard with the complete electronics.
4º – We remove the buttons for the guitar strap and remove the screws that hold the neck to the body. The neck is attached at the back with a plate and 4 screws.
5º – At this point we have the body completely cleaned and disassembled.
6º – Dismantle the neck pegbox by removing all the screws from behind the headstock and remove the pegs.
7º – The only thing left to do is to remove the ferrules of the headstock from the front of the guitar’s headstock. To do this, look for some kind of tool that has a larger diameter than the peg hole. Gently tap on the back to remove them. Now we have all the hardware separated from the neck and body.
Preparation for the painting process:
1º – Now we have to cover the neck pocket area with tape to prevent it from getting stained during the painting process. To do this we use masking tape and cut off the excess with a cutter.
2º – We proceed to screw the tool we have to paint the guitar. Usually some wood with the width of the pocket or tools are used to hold the body during the painting process.


